Reactivate Deleted Node
If you previously deleted a node and would like to reinstate it to your Guardian instance without having to re-add, scan, and configure the node from scratch - you can use the reactivate feature. When a node is reactivated, it is restored to its previous state prior to the deletion. Any node scan results, scheduled job runs, benchmarks and policies are automatically re-applied.
Tip: This feature was introduced in V3.56.0 of the Guardian web application. For more information, see June 2025 Monthly Release.
When a node is deleted, a 'Node Deleted' event is logged in the Events tab (Control > Events). Within the event's details, the node_id field is displayed. You can use the node ID to locate your deleted node and reactivate it, see below for more information.
Tip: The node_id field was added to every 'Node Deleted' event in V3.56.0 of the Guardian web application onwards. To reactivate a node that was deleted prior to this release, you can find the node_id in a 'Node Updated' event in lieu.
To reactivate a deleted node, complete the following steps:
-
In the Events tab, locate the 'Node Deleted' event and click the row to expand the event details and access the
node_idfield.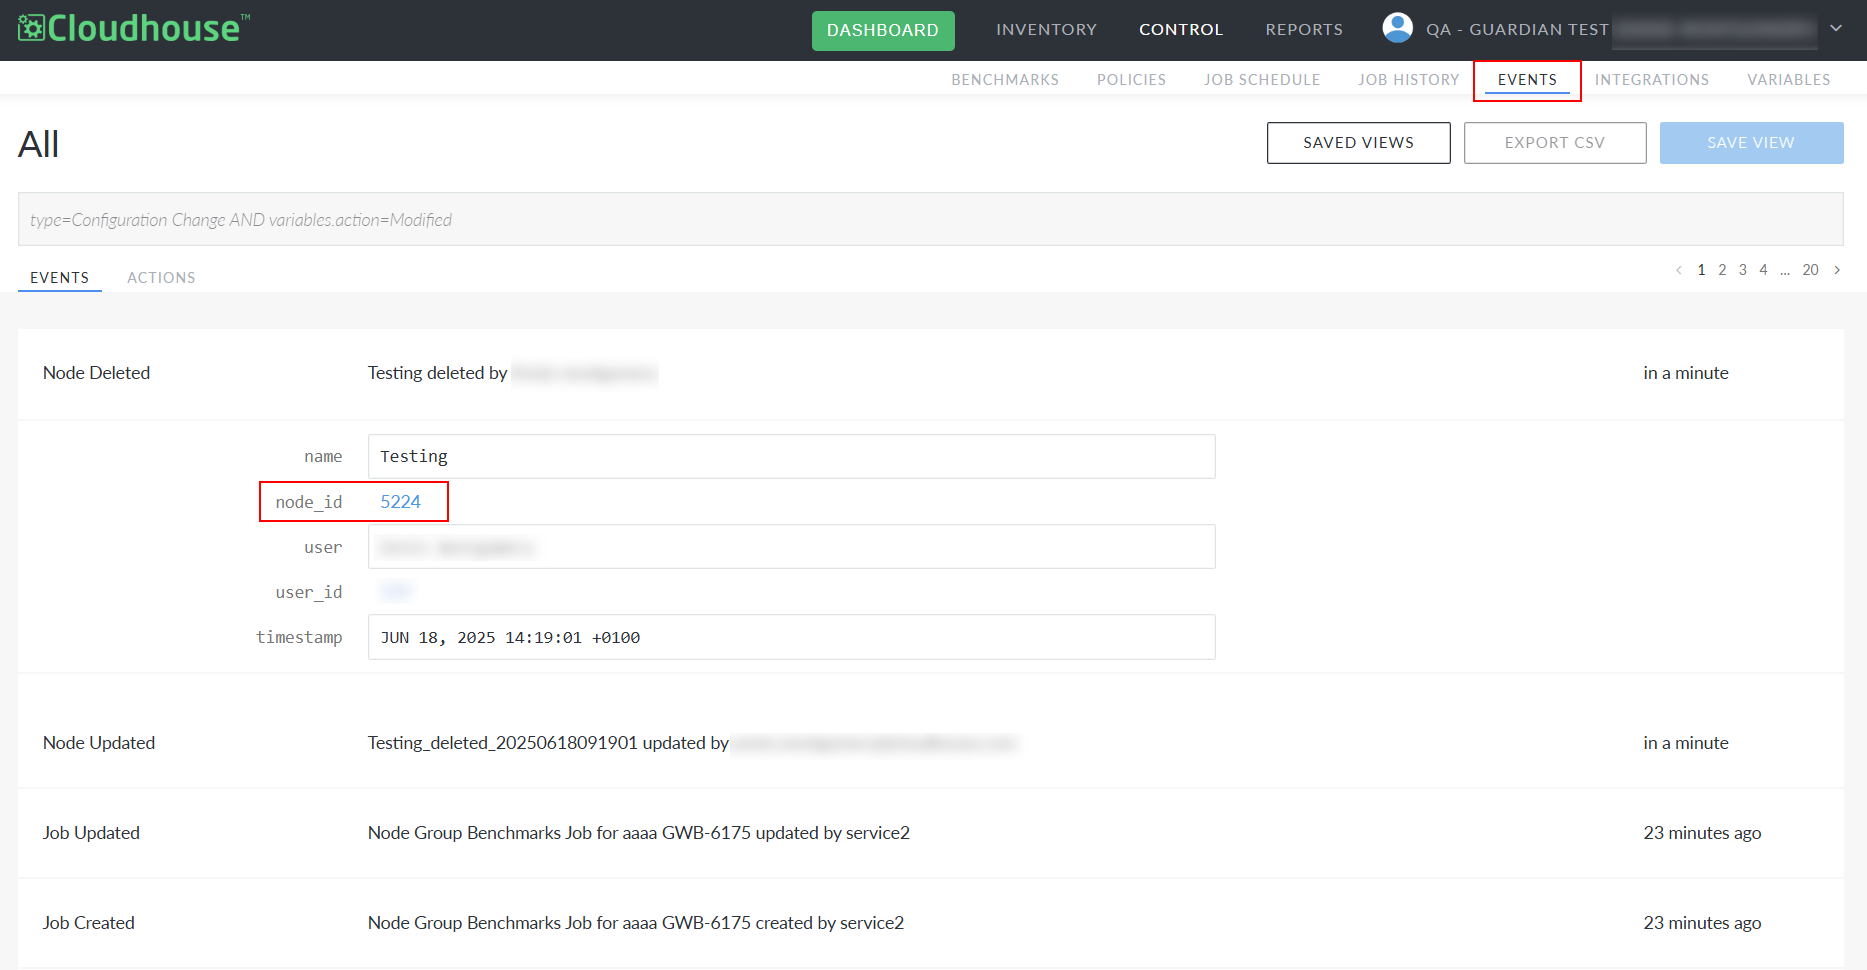
-
Click the
node_idfield to display the results of the deleted node's most recent scan.
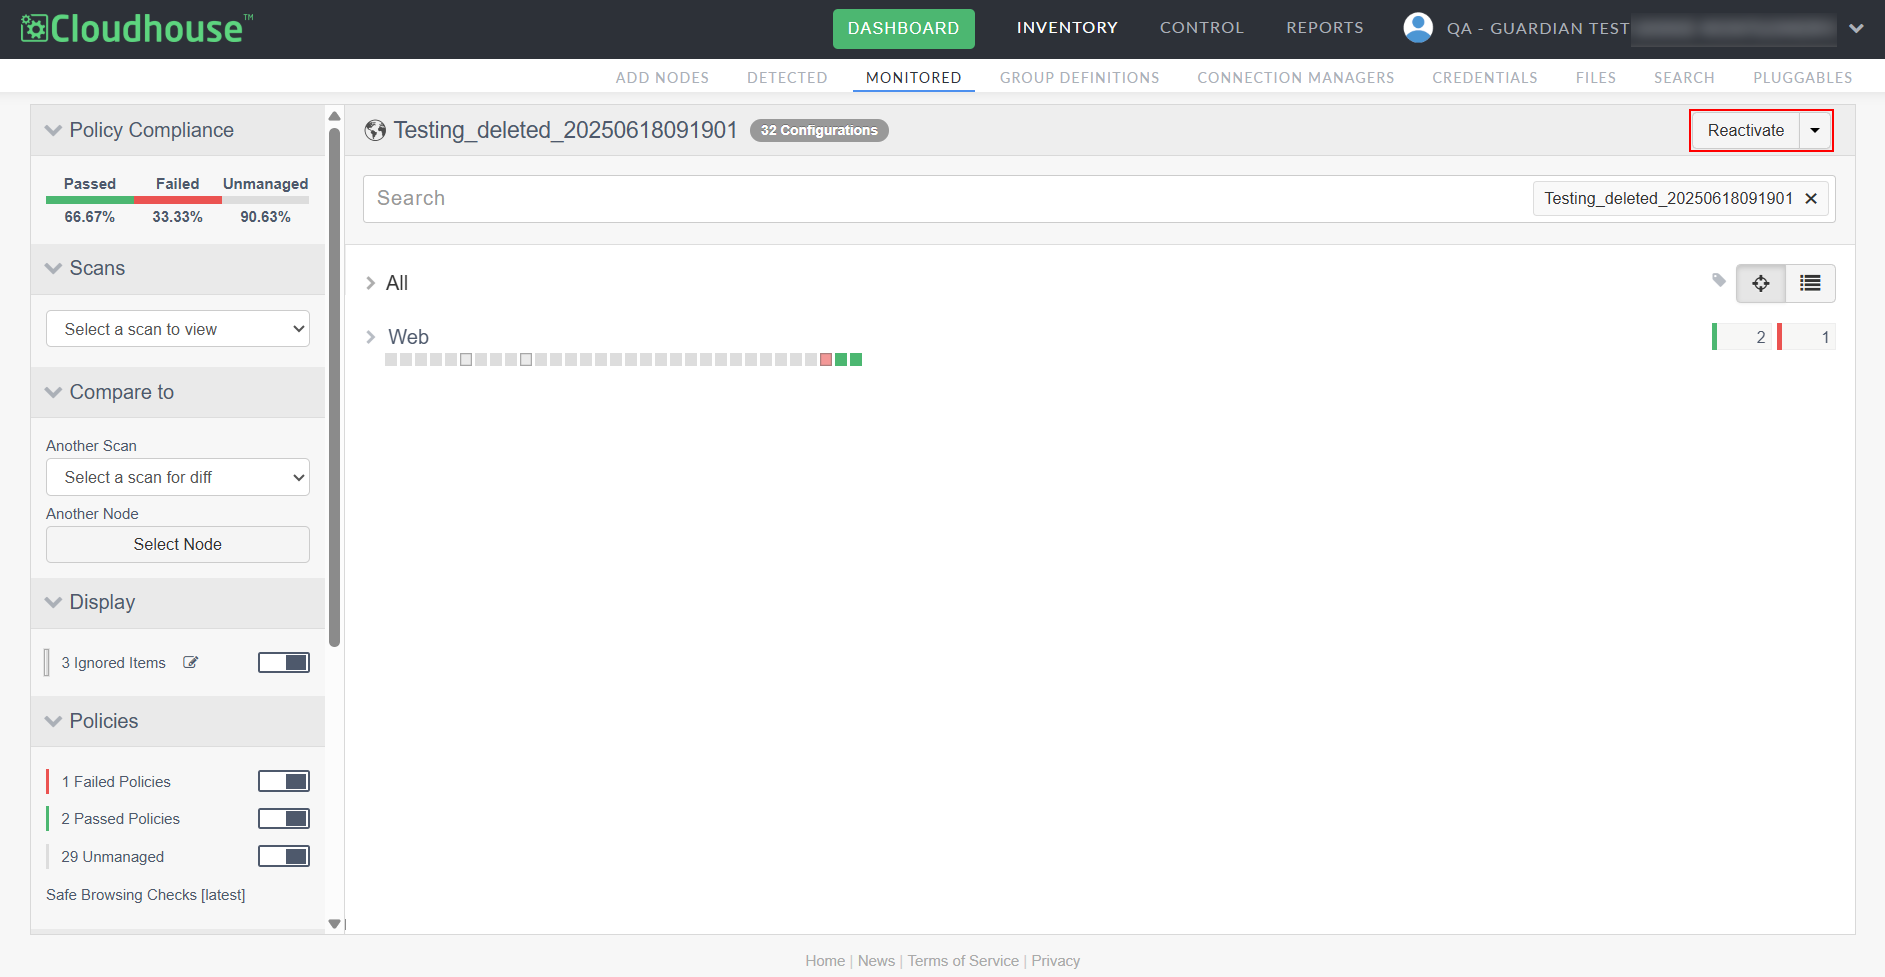
-
On the node scan results page, click the Reactivate button to re-add the node to your Guardian instance.
The node is then added back to your Guardian instance. There is no limit on how long you can wait to reactivate a node. Any previously applied policies, scheduled jobs, etc. are automatically reinstated, alongside any scan data.
Tip: Additionally, you can reactivate a node that was deleted prior to V3.56.0 of Guardian by adding a new node (or agent node) with the same node name, details, and external ID as the previously deleted node. If the details in the new node match a previously deleted node, the node data is reinstated, alongside any previously applied policies, scheduled jobs, etc.